The M9 pistol should be
disassembled into its major components and cleaned immediately after firing.
All metal components and surfaces that have been exposed to powder fouling
should be cleaned using CLP on a bore-cleaning patch. The same procedure is
used to clean the receiver. After it has been cleaned and wiped dry, a thin
coat of CLP is applied by rubbing with a cloth. This lubricates and
preserves the exposed metal parts during all normal temperature ranges. When
not in use, the pistol should be inspected weekly and cleaned and lubricated
when necessary.
CAUTION: When
using CLP, do not use any other type cleaner. Never mix CLP with RBC or LSA.
- Clear and disassemble the weapon.
- The first step in maintenance is to
clear the weapon. This applies in all situations, not just after firing.
Soldiers must always assume the weapon is loaded. To clear the pistol,
perform the following procedures.
- Place the decocking/safety lever in
the SAFE down position.
- Hold the pistol in the raised pistol
position.
- Depress the magazine release button
and remove the magazine from the pistol.
- Pull the slide to the rear and
remove any chambered round.
- Push the slide stop up, locking the
slide to the rear.
- Look into the chamber to ensure that
it is empty.
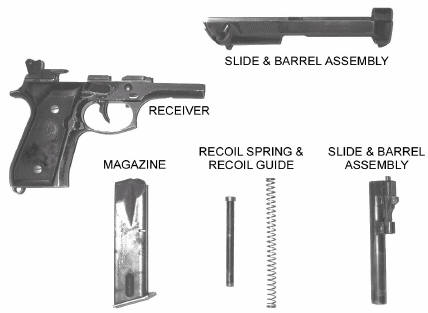
- To disassemble the pistol, perform the
following procedures.
- Depress the slide stop and let the
slide go forward.
- Hold the pistol in the right hand
with the muzzle slightly raised.
- Press the disassembly lever button
with the forefinger.
- Rotate the disassembly lever
downward until it stops.
- Pull the slide and barrel assembly
forward and remove it from the receiver.
- Carefully and lightly compress the
recoil spring and spring guide. At the same time, lift up and remove
them.
- Separate the recoil spring from the
spring guide.
- Push in on the locking block plunger
while pushing the barrel forward slightly.
- Lift and remove the locking block
and barrel assembly from the slide.
- Wipe or brush dirt, dust, and carbon
buildup from the disassembled pistol.
- Use CLP to help remove carbon buildup
and stubborn dirt and grime.
- Pay particular attention to the bolt
face, guide rails on the receiver, grooves on the slide, and other
hard-to-reach areas.
NOTE: Do not use mineral
spirits, paint thinner, or dry cleaning solvent to clean the pistol. Use
only issued lubricants and cleaners, such as CLP or LSA.
- Clean the bore and chamber using CLP and
fresh swabs.
- Lubricate the pistol by covering all
surfaces including the bore and chamber with a light coat of CLP. In
extremely hot or cold weather, refer to the technical manual for
lubricating procedures and materials.
GENERAL ASSEMBLY:
To assemble the M9 or M11 pistol, simply
reverse the procedures used to disassemble the pistol.
- Grasp the slide with the bottom facing up.
- With the other hand, grasp the barrel assembly with the locking block
facing up.
- Insert the muzzle into the forward end of the slide and, at the same
time, lower the rear of the barrel assembly by aligning the extractor
cutout with the extractor.
NOTE: The locking block
will fall into the locked position in the slide.
- Insert the recoil spring onto the recoil spring guide.
CAUTION: Maintain spring
tension until the spring guide is fully seated in the cutaway on the locking
block.
- Insert the end of the recoil spring and the recoil
spring guide into the recoil spring housing. At the same time, compress
the recoil spring guide until it is fully seated on the locking block
cutaway.
CAUTION: Do not pull the
trigger while placing the slide on the receiver.
- f. Ensure that the hammer is unlocked,
the firing pin block is in the DOWN position, and the decocking/safety
lever is in the SAFE position.
- g. Grasp the slide and barrel assembly
with the sights UP, and align the slide on the receiver assembly guide
rails.
- h. Push until the rear of the slide is a
short distance beyond the rear of the receiver assembly and hold. At the
same time, rotate the disassembly latch lever upward. A click indicates a
positive lock.
FUNCTION CHECK:
Always perform a function check after the
pistol is reassembled to ensure it is working properly. To perform a
function check:
- Clear the pistol in accordance with the
unloading procedures.
- Depress the slide stop, letting the
slide go forward.
- Insert an empty magazine into the
pistol.
- Retract the slide fully and release it.
The slide should lock to the rear.
- Depress the magazine release button and
remove the magazine.
- Ensure the decocking/safety lever is in
the SAFE position.
- Depress the slide stop. When the slide
goes forward, the hammer should fall to the forward position.
- Squeeze and release the trigger. The
firing pin block should move up and down and the hammer should not move.
- Place the decocking/safety lever in the
fire POSITION.
- Squeeze the trigger to check double
action. The hammer should cock and fall.
- Squeeze the trigger again. Hold it to
the rear. Manually retract and release the slide. Release the trigger. A
click should be heard and the hammer should not fall.
- Squeeze the trigger to check the single
action. The hammer should fall.
|